Image source
Move-out day always feels like a big deal. There is so much to finish, and the clock keeps moving no matter how prepared you feel. Packing becomes a mess, trash bags pile up, and cleaning sometimes feels like the last thing you want to do.
If you live in a busy city like Orlando, this can feel even harder because life does not slow down while you get ready to leave. A clear DIY cleaning checklist helps you stay organized and focused. It also helps you leave your place in good shape, so the next person sees a clean space instead of leftover dust and clutter. With the right plan, you can move out with less stress and less guesswork.
1. Getting Started the Right Way
A smooth cleaning routine starts with simple planning. Before you grab a sponge or a bottle of cleaner, take a minute to look over your lease or move-out instructions. Many property managers list the cleaning tasks they expect from you. When you know these details, you can avoid last-minute problems.
This is also the point where you decide what you can handle on your own. Packing and cleaning at the same time takes energy. If your move feels larger than usual, you can focus on cleaning while letting professionals handle the heavy work. Many people choose long distance movers in Orlando when they need help with the bigger parts of the move. This saves a lot of time and lets you give your full attention to the cleaning checklist.
Now gather your cleaning supplies. Keep everything in a single caddy so you can carry it with you from room to room. When everything stays together, you do not waste time searching for tools. You start strong and stay on track.
2. Kitchen Cleaning Checklist
The kitchen needs the most attention on move-out day. Food spills, crumbs, oil, and daily use leave many spots that need cleaning.
Start with the fridge. Remove everything and throw away old food. Pack what you want to take. Remove the shelves and drawers so you can wash them in warm, soapy water. Wipe the inside walls and dry everything before putting the parts back inside.
Move to the stove. Clean the top and scrape off any burnt spots. If you have a glass top stove, use a cleaner made for that surface. For the oven, apply a simple cleaner. If you prefer a DIY option, mix baking soda with water until it becomes a paste. Spread it inside the oven and let it sit for a while before wiping it away.
Clean the microwave by heating a cup of water inside for one minute. The steam softens stuck food and makes it easy to wipe clean. Clean the outside too, so it looks neat.
Scrub the sink with baking soda and rinse with warm water. Clean the faucet so it shines. Wipe down the counters, cabinets, and backsplash. Pay attention to handles because they gather fingerprints and grease. Finish the kitchen by sweeping and mopping the floor. Take out the trash so it smells fresh.
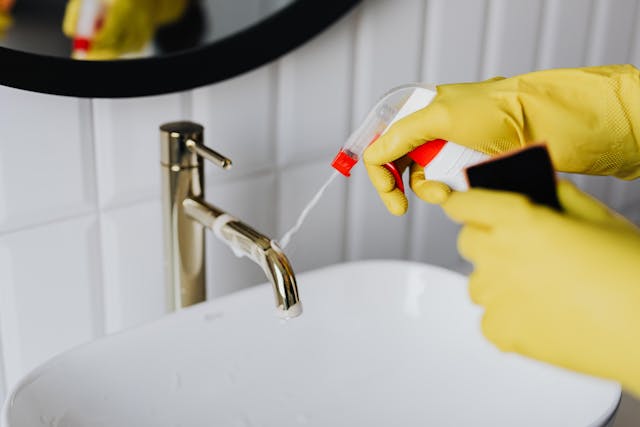
3. Bathroom Cleaning Checklist
The bathroom becomes much easier to clean when you follow a clear order. Start with the shower or tub. Spray the cleaner and give it a few minutes to work. Scrub and rinse well.
Clean the toilet next. Scrub the bowl. Wipe the seat, lid, and the outside of the toilet. Clean around the base where dust and hair collect.
Move to the sink. Wipe the faucet and handles. Empty the drawers and cabinets and clean inside each one. Clean the mirror with glass cleaner until it looks clear and streak-free.
Finish by sweeping and mopping the floor. Check the bathroom fan and wipe any dust from the cover.
4. Bedroom Cleaning Checklist
A clean bedroom starts with an empty bedroom. Walk through the room and remove everything. Look under the bed and behind furniture. Check all drawers and closets.
Dust all surfaces. Dust the shelves, window sills, vents, and light fixtures. When you dust each area, the room feels brighter and cleaner right away.
Clean the closet by wiping the shelves and removing stickers or hooks if you used them. Check the walls for small marks. Many marks wipe off with a damp cloth and a little cleaner.
Vacuum or mop the floor. Move slowly so you don’t catch dust in corners and near the baseboards.
5. Living Room and Common Areas Checklist
Shared spaces show the most signs of daily life, so they need careful cleaning. Start with dusting the larger surfaces. Dust the TV stand, shelves, coffee table, and window frames. Clean switches, outlets, and door handles.
Clean the windows with glass cleaner. Wipe the tracks and sills. Dust or wipe blinds. Look for scuff marks on the walls. Many small marks come off with a gentle cleaner. Clean the baseboards to remove dust and dirt.
6. Final Touches Before You Leave
When you finish the main cleaning, do a slow walk-through the home. A final check helps you catch small things that might slip by. Look inside closets again. Open every drawer. Check the top of the shelves. Look behind doors and corners that stay hidden during busy days.
Touch up anything you notice. If you see a spot on the floor, wipe it. If you see a bit of dust, remove it. These small steps make a big difference when someone inspects the place later.
Take a few photos of every room after you finish. Photos help you feel confident that you left the home clean and in good shape. This also protects you if a landlord asks about cleaning later.
Turn off the lights. Lock the windows. Make sure everything looks ready. Return the keys and take one last look to make sure you did not forget anything.
Move-out cleaning feels easier when you follow a simple plan. A clear checklist guides you from one room to another without stress. It helps you stay calm while you finish each task. When you leave your place clean, you end your move-out on a positive note and step into your next home with a sense of progress and control.