Whether your hobbies include woodworking, painting or something entirely different, a home workshop can make things easier. You’ll no longer have to worry about storing your tools or keeping your projects organized. That is, as long as your workshop is orderly.
If your workshop is a mess at the moment, you know just how frustrating it can be to reach for something that isn’t there. With that in mind, here are some tips and tricks to help you organize, even if you don’t have a lot of space to work with.
Prepare Your Storage Solutions
If you haven’t been organizing your home workshop, chances are it’s not in great shape. You might be staring at it with a blank expression, unsure where to start.
Before you start cleaning, you’ll want to have everything you need to finish the job right in front of you. This includes trash bags for removing garbage and boxes for anything you’re planning to donate or sell. It’s also a good idea to have storage bins on hand for things you’re going to keep.
If your garage doubles as your workshop, this might be a significant step. You’ll have to sort through all the stuff you’ve been stashing there because it wouldn’t fit anywhere else, and that can be a time-consuming task.
Now is also an excellent time to set up your storage plan, so you know whether you’re adding shelving, overhead storage, cabinets, totes or some combination of the above. We’ll talk more about those in a moment.

Start With Your Workbench
What’s a workshop without a functional workbench? Start here, because you’re going to build your entire shop around it. You’ve got two choices for this step — buy and assemble a pre-made bench or purchase some lumber and build it yourself.
What you choose will depend on your budget and where your skills lie. If woodworking is not your forte, you might be better off buying a bench instead of building one.
The exact bench you choose will depend on your needs, but ideally, you’ll want to look for something wide enough to accommodate your hobbies and heavy enough to support your projects without sliding across the floor.
Things like drawers or cabinet doors are optional, but useful. You can choose a bench with wheels or without, made of wood, aluminum or steel. The choice is yours, and the options are endless.
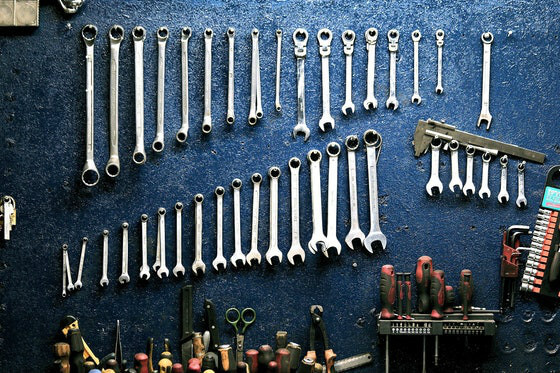
Hang a Pegboard for Tools
Toolboxes are a great investment for things that you don’t use every day, but hunting through boxes — even organized ones — for that specific screwdriver or your missing 10mm socket is a pain.
Instead, once you’ve chosen a place for your workbench, hang a pegboard on the wall behind it. It will give you a place to hang all the tools you regularly use so they’re easy to find, making your work that much easier.
If you’re not a fan of actual pegboard, because it doesn’t hold up in all environments, replace it with a sheet of plywood. From there, you can either drill holes for pegs or add screws and hooks wherever you need them.
Invest in Good Shelving or Build Something Sturdy
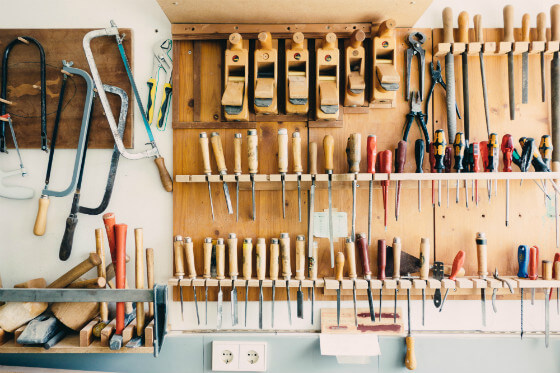
You’re going to want quality shelving to help you organize the stuff that isn’t going to live on or behind your workbench. Again, you have two options — you can buy pre-made shelving and assemble it where you need it the most, or buy lumber and build it yourself.
If you choose the former option, we recommend investing in high-quality wood or metal shelving that will hold all your supplies for years to come. If you choose to build your shelving, you have the opportunity to customize it to fit your unique space.
If you don’t have a lot of floor space to work with, buying pre-made shelving is often going to take up what little space you have. With custom work, you can build your shelves onto the walls, into the walls or even use the corners and otherwise empty spaces to make the most out of your workshop.
Get What You Can Off the Ground
If you don’t have a lot of spare space, but you have a few feet between the top of your head and the ceiling, overhead storage might be your best option. You don’t need to spend a lot of money on pre-made overhead storage either.
There are two easy options anyone can make. The first uses PVC pipe, to give you somewhere to store things like long tools or even totes and boxes if the pipes are close enough together.
The second allows you to hang totes from the ceiling. All you need is some lengths of 2″ x 2″ lumber and some 1″ x 4″ planks. Screw the 2″ x 2″s into the ceiling framework with 3.5″ screws, and then screw the 1″ x 4″ flat against the 2″ x 2″. Doing this will create a lip that’s the perfect size to support most plastic totes.
It’s ideal for lightweight items like clothing or seasonal decorations, but it won’t support heavy boxes. You’ll want to keep those on your shelves or on the floor.
When You’re Finished, Keep It Organized
Once you’ve organized your home workshop, the best thing you can do is keep it that way. Not only will it make your projects easier to complete, but you also won’t have to go through the hassle of organizing your space again in the future.

Author Bio:
Dylan Bartlett, aka, “The Regular Guide,” writes about DIY projects, home improvement and similar topics on his site. Check out Just a Regular Guide for more, or follow Dylan on Twitter @theregularguide for frequent updates.


 Sneak Peek at Sugar Factory’s Valentine’s